Wednesday, October 6, 2010

Steamed Egg – (계란찜) - Version 3.0

This California weather is sort of crazy, isn’t it?  EARTHQUAKE weather for sure.  =/  Growing up in Cali, I’m so used to earthquakes.  I’ve been through quite a few of the big ones so they hardly bother me anymore – but still the thought of the next big one is pretty scary.  =P

The rain has made it a lazy day today.  All of Munchkin’s sports activities this week have been cancelled due to rain.  This means the kid is going stir-crazy from 3PM until his bed time.  Stir crazy kid means a mom that has to get dinner on the table as quickly as possible. 

The following is a quick and easy way to make steamed egg all in one pot.  There are other ways to make egg jjim and I have VERSION 1 and VERSON 2 right here.

Ingredients:

  • 2 Eggs
  • 1 CUP water
  • 2 TSP shrimp jut
  • handful of green onions


IMG_9723

First crack two eggs into a small stone pot.


IMG_9725

Pour a cup of water into it.


IMG_9727

Add 2 TSP of shrimp jut LIQUID ONLY.


IMG_9730

Whisk it all around thoroughly using a fork and place it on the stove on medium heat.


IMG_9732

Once it looks like it’s just about to boil, turn down the heat to low…
 

IMG_9735 
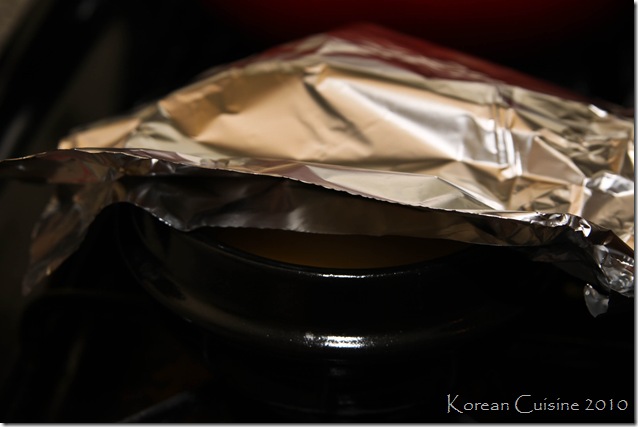
…and add a tin foil tent on top with a tiny opening to let some air out.  Just let it simmer on low for about 10-15 minutes.


IMG_9737 

When it looks just about done, throw some green onions on top.


IMG_9743

Let it continue to simmer for a couple of minutes and you’re ready to serve!  This type of egg jjim tastes best when served fresh.


IMG_9748

Even just after just a few minutes, it starts to flatten out. 


IMG_9749

It still tastes great though!  This is the quickest and easiest way to enjoy egg jjim besides microwaving it.  Whenever I get around to it, I’ll post up the microwave version.  Enjoy and stay warm!


IMG_9733IMG_9734

IMG_9731

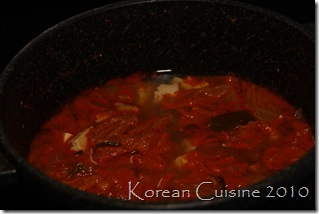
Munchkin’s dinner tonight also consisted of miyuk gook and clams.  =P  The kimchi jjigae was leftover from yesterday and was for ME.  =)

Tuesday, October 5, 2010

Spicy Chicken Gizzards – 매운 닭똥집 볶음

I started this recipe a couple weeks ago, but never had the time to finish up the post. I’ll attempt to finish it now from my memory.  =P


IMG_7202

IMG_9620IMG_9621

I’m reusing the pictures from my older post on Fried Chicken Gizzards because I completely forgot to take pictures during this stage.  Basically, cut your gizzards up wash in some flour/salt and then boil it for about 10 minutes to rid of all impurities.


IMG_9622

Meanwhile, get your sauce mixture ready.  1TB red pepper powder, 1TB red pepper paste, 1TSP sesame oil, 1/2TSP sugar, 1TSP soy sauce, and a handful of green onions.


IMG_9623IMG_9626

After the chicken is done boiling, add the sauce mixture to it and mix well.


IMG_9716

Let it sit for about 15 minutes to allow the flavors to coat the gizzards.


IMG_9719

Then throw everything onto a hot pan with some garlic cloves and onions and you’re ready to serve!  Enjoy~

Wednesday, September 29, 2010

Chicken Porridge with Vegetables

I haven’t made this type of jook in so long…since Munchkin was a baby?   

Ingredients Needed:

  • 1 small chicken breast
  • 1/2  CUP white rice, 1/2 CUP sweet rice
  • 6 CUPS of various chopped vegetables
  • 1 can vegetable broth
  • 1 32 OZ box of chicken broth
  • 2-3 CUPS water


IMG_9670

We are a small family of three, so we hardly ever eat whole packs of any type of meat.  As soon as I get home from the grocery store, I saran wrap each individual breast filet and then store them in a large Ziploc bag with the date on it.  Whenever I need chicken, I just pull out however many breasts I need.  It makes cooking easier when you don’t have to defrost the whole pack of meat at once.


IMG_9686

Begin by washing and rinsing equal parts white rice and sweet rice.  This was about 1 CUP total.  Let it sit in the water for a few hours to soften up.


IMG_9671IMG_9672

IMG_9679 IMG_9697

Meanwhile, prep all the veggies you want to use.  There is no *measurement* for this part so use whatever you have on hand.  I also added some squash but forgot to take a picture of it.


IMG_9687

Bring a pot of water to a boil and throw in the chicken and let it boil for about 10 minutes to rid of all the impurities.


IMG_9698

Then rinse the chicken under cool water and just chop it up into small pieces and set it aside.


IMG_9680

Now you can start chopping away at your veggies.  If you have a food processor, by all means throw it in there.  But I actually prefer to just CHOP, CHOP, CHOP.  There’s something therapeutic about standing in a kitchen and chopping away.  I started making this porridge after midnight yesterday and I was actually able to complete my MOH speech (in my head) that I have do next March.  LOL.


IMG_9688

I then chopped some broccoli and threw that in there as well.


IMG_9689

Some mushrooms…


IMG_9690

Carrots and potatoes…


IMG_9691

Start the porridge by placing the cup of rice & sweet rice mixture into a pot.


IMG_9692

Then add one whole can of vegetable broth and bring it to a boil.


IMG_9694

Once it starts boiling…


IMG_9696

Throw in all your vegetables and the chicken pieces!


IMG_9695

At this point, start adding some chicken broth a little bit at a time.  I ended up using all 32 OZ. PLUS an additional 2-3 CUPS of water. 

If you are going to feed this to a baby, skip all the store bought broths and just substitute with anchovy broth, real chicken broth or just plain old water.  I’m proud to say that Munchkin grew up eating this stuff and to this day, he’s still a pretty good vegetable eater.  =)  I would alternate with different meats and veggies, but pretty much I used the same concept for all his baby food.  I pureed everything when he was younger and after he started getting his teeth, I started to make his jook into a chunkier consistency.


IMG_9699

Anyhow, just keep letting it simmer while stirring constantly so it doesn’t stick to the bottom. 


IMG_9703

After about an hour and a half - it will get this nice, soft porridge consistency. 


IMG_9706

I wasn’t sure how soft the food had to be for the person this porridge was made for, so I pureed two batches and left two as is.


IMG_9710 

Jook~ with chicken and a load of vegetables pureed for easy consumption.


IMG_9711

Even though he’s no longer a baby, Munchkin will still devour this stuff.  This was his breakfast.


IMG_9714

Tada!  It’s the perfect dish for infants or for someone who might have difficulty chewing.  You can substitute the chicken for beef, you can use a different broth, you can add a variety of different vegetables.  Some other veggies I use are edamame beans, corn, or even spinach.  Get creative! 

Monday, September 27, 2010

Spicy Chicken BBQ – Dak Galbi – 닭 갈비

I had all the ingredients for Dak Galbi conveniently on hand, so I decided to give it a go tonight.  I was going to save this post for later, but decided what the heck - I’ve been on a blogging binge eh?  =P


Ingredients Needed:

  • 2 small chicken breasts - I buy the thin breast filets at Ralphs and saran wrap each individual breast and store them in bags in the freezer – I will take a picture one day.
  • 1/2 onion – you can use a whole onion, I just had half an onion lying around.  =)
  • 1 small sweet potato
  • 1 CUP of dduk
  • handful of mushrooms
  • 1 jalapeno
  • handful of garlic cloves
  • handful of chopped green onions
  • 1 CUP of noodles (optional)
  • sauce mixture: 1/2 CAN of chicken broth (save the leftover broth for later), 2 TB soy sauce, 1 TB minced garlic, 2 TB red pepper powder, 2 TB gochujang, 1 TB honey powder (or substitute with sugar), 1 TB rice wine(purely optional), 2 TB ketchup


IMG_9633

IMG_9634IMG_9638

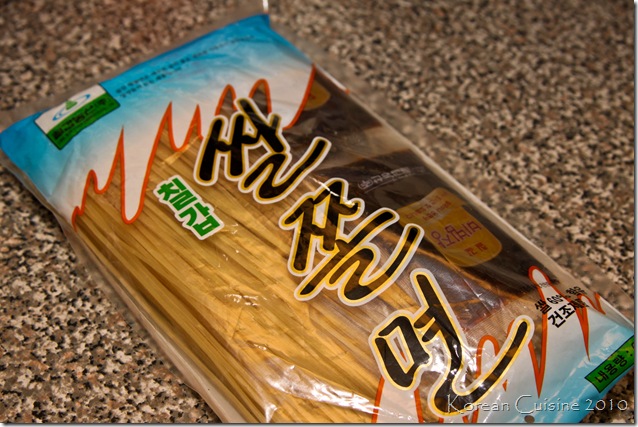
I had an old bag of jjol-myun lurking in my cupboards, so I decided to use it up for this recipe.  If you don’t have noodles, no worries.  Just skip this part.  I like boiling my noodles separately so that I can wash the starch away before adding it into the main meal.  You can totally just add the uncooked noodles straight to the dak galbi if you want though.  No biggie.


IMG_9644IMG_9645

IMG_9635IMG_9636

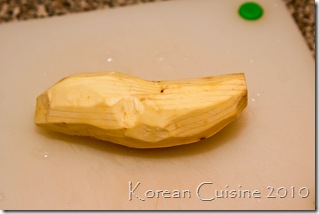
Next, ready your veggies and dduk.  I used 1 small sweet potato, 1/2 onion, 1 large mushroom, handful of garlic cloves, 1/2 head of cabbage, and a cupful of dduk.  Feel free to add any other veggies you might have such as carrots or squash.


IMG_9646

In a small bowl mix together the following:

  • 1/2 CAN of chicken broth (save the leftover broth for later)
  • 2 TB soy sauce
  • 1 TB minced garlic
  • 2 TB red pepper powder
  • 2 TB red pepper paste (gochujang)
  • 1 TB honey powder (or substitute with sugar)
  • 1 TB rice wine (purely optional)
  • 2 TB ketchup

If you have any questions about any of the ingredients, please take a look at KOREAN COOKING 101.  I often get questions about certain recipe ingredients, and if I don’t reply (sorry!) – it’s probably already on Korean Cooking 101. =P


IMG_9648IMG_9649

First add the sauce and veggies into a pot (I have a jungol pot, but I was too lazy to bring it out today) and let it cook for a little bit.


IMG_9650

Add your cut up chicken breasts next and then mix everything thoroughly.


IMG_9651IMG_9653

Meanwhile, cut up a jalapeno and throw it in there as well with some green onions.


IMG_9654IMG_9656

At this point, I poured in more chicken broth.  I probably could have gotten away with only a little more, but I hate wasting things so I poured in the rest of the can.  =P  It was probably a bit too much, but oh wells.  Anyhow, at this point throw in your noodles!  Your noodles are already cooked, so just let everything simmer together for about five minutes and you’re ready to serve.


IMG_9659IMG_9662

IMG_9668

IMG_9661

Voila~  The MR and Munchkin both devoured this tonight and it was a nice change from our normal routine.  I hope you enjoy it as well!   Whew, I’ve been on a posting rampage today. 

It must be time for another scan soon.  ;)

LinkWithin

Related Posts with Thumbnails
Bookmark and Share