Coming soon!
Hopefully in the next day or two, but hope you understand if that day or two ends up being a month or two. ;)
I AM a little preoccupied with other things lately...

Showing posts with label Side Dishes (Banchans). Show all posts
Showing posts with label Side Dishes (Banchans). Show all posts
Wednesday, April 27, 2011


Friday, November 26, 2010
Fresh Kimchi–Gut Jul Eeh Kimchi with Raw Oysters
I hope everyone had a fabulous Thanksgiving! I’m sure our dinner table isn’t much different from some of the other Korean-American dinner tables out there. For as long as I can remember we have always had Korean food on Thanksgiving. It wasn’t until I was old enough to learn how to roast a turkey that our family started having turkey on Thanksgiving. =P Now our tables look like a mix of the old and new with Korean food intermingling with American food.
One of my mom’s specialties around the holidays is a fresh gut-jul-eeh kimchi she makes specifically for my halmoni who doesn’t like the sourness of fermented kimchi. I asked my mom where she learned to cook and she told me that all of the myun-noo-ris in our family were taught how to cook by my grandmother. I now understand why the food at all the different households on my dad’s side pretty much tastes the same. My grandmother hails from a town called Andong and I was told by many people that the ladies of Andong are known for their cooking prowess.
I went to my parent’s house early in the morning to start the ham and turkey, so I was actually able to watch her make this fresh kimchi from start to finish. It is one of my husband’s favorite dishes, so I made sure to note how much of everything she used. Of course there are no exact measurements, I was able to eyeball her proportions pretty well…I think. =P

First, a small peek at our dinner table. My mom’s *famous* chong-gak kimchi (really, it’s GOOD – and I’m not just saying that because she’s my mom), kongnamool moochim, cornbread stuffing (with cranberries, apples, turkey sausage, almonds, onions, parsley, celery, and…whatever else I had on hand), fresh cranberry sauce, grilled snapper, spinach moochim, roasted ham, roasted turkey, garlic mashed potatoes and creamed corn. I made all the American food and my mom made all the Korean food. We are a good combo in the kitchen and totally know how to work around each other now.
Have I mentioned how much I love my mom? She’s my favorite person next to Munchkin. =P


Take one cucumber and chop it up like so and then sprinkle a little bit of sea salt and set aside.

Then grab one napa and start washing it and taking it apart.

Then take a knife and start slicing the napa into little pieces straight into the same bowl. My mom just holds it up and just takes her knife and slices it directly above the bowl. Then generously sprinkle salt on top and set it aside for a couple of hours.

After the napa begins to look soft, rinse the salt water out under cool water and then julienne half a moo into the bowl as well.

Add some green onions…

Add about 1/4 cup of minced garlic.

Meanwhile defrost your raw oysters. I wasn’t able to take a picture of the bag, but my mom tells me they sell it frozen in a bag and it’s usually next to the frozen fish area…

Then add about 4-5 TB of sesame seeds…
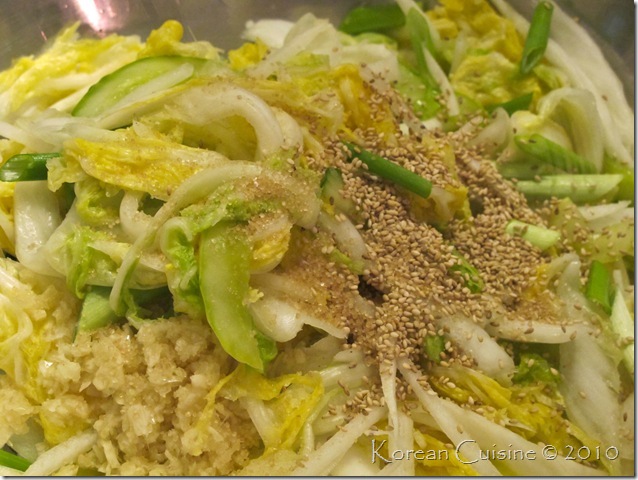
1-2 TB of sugar…(my mom uses this Korean sugar that looks brown)

Add your red pepper flakes. Depending on the type of red pepper flakes you have, you have to adjust your measurements accordingly. This is the one my MIL brought back from Korea last year and it’s very light. We tend to use a lot of more of this when making recipes because it’s not as red.

My mom then added the oysters (about 1/2 cup) and shrimp jut (1 TB). I actually asked my mom why she doesn’t chop up the raw oysters (since they tend to look pretty GROSS) and she said it’s because then it *bursts* and the kimchi tastes much more fishy.

Mix, mix, mix!

And we realized that it could use a little more color, so in went some more red pepper powder.

And voila! Fresh gut-jul-eeh kimchi. This tastes best when served within an hour or two of preparation. It will naturally ferment into kimchi as well and can be eaten when it’s fermented, but because a lot of the real steps to making kimchi were skipped, this type never tastes as good as real beh-choo kimchi. Yes, I will do a step-by-step of beh-choo kimchi one day…
I hope everyone had a great Thanksgiving. I hope you found time to reminisce your past and find many things you are thankful for. Life can throw unexpected twists and turns to you, but always remember that there is a light at the end of tunnel.
My latest scans all came back clear. My chest is free of mets and my head and neck is free of disease as well. Two years after diagnosis, I am still cancer-free. I’m sure there are tiny little buggers lurking around somewhere inside my body, but I’m hopeful that I will live to see Munchkin grow old.
Health, happiness, love and many blessings to all my readers! Thank you for having been my outlet to break down and reconstruct myself these past couple of years. This blog was truly my form of therapy. It is a small slice of space away from my real world. It’s a place I come to when I’m feeling a bit down.
Writing these posts and sharing our families recipes is cathartic. It’s a way to heal. So thank you for helping me heal.
P.S. For those of you who are curious. All pictures were taken with my Canon G11. I didn’t have my Canon 50D with me on this day.
Tuesday, November 9, 2010
Ggak Ddoogi–(깍두기)–Version 2.0
Is fall/winter (they sorta just blend in SoCal don’t they?) finally hitting SoCal? About time, eh?
It has been hot for so long that I’m sort of welcoming this cold. SORT OF. I’ll always be a SoCal girl and that means my body can only tolerate so much cold.
On a side note, the MR has been out of the country for almost a month now leaving our house feeling a bit empty. It has been just Munchkin and I for the last 23 days and counting. Although it has been a bit trying at times, I’m relishing my one on one time with him. He is now an almost five-year-old and I’m thankful every day that I was able to be here for three birthday parties after my diagnosis (I was diagnosed the day before his 3rd birthday party).
I see Munchkin developing leaps and bounds every day. He talks SO much. SOOOOOOO much. He talks about anything and everything under the sun. “Can I ask you something?” is one of his favorite lines and you bet he will definitely ASK ME SOMETHING. He drives me to the brink of insanity, but will then turn around and do something so sweet and inspiring that I thank God for each and every day.
To be honest, since it’s only Munchkin and I – our consumption of Korean food has been almost nil. =P With the exception of kimchi, Munchkin and I rarely eat Korean food. We recently devoured the latest batch of my mom’s chong-gak-kimchi so I decided it was time to make some ggak ddoogi in it’s place. I opted for a quicker and milder version this time since I was pressed for time and feeling absolutely lazy.
Ingredients Needed:
- 5 LBS of daikon radish (moo)
- 1/4 CUP red pepper powder, 4 TB minced garlic, 1 TB salt, 3 TB honey powder, 2 TB rice wine, 1/2 TB ginger powder, 3 TB minced shrimp jut plus about 1 TB of the shrimp jut liquid.

I bought about 5 lbs. of moo (daikon radish) at the K-market and went to work on my kitchen floor. Yes, I did the kimchi squat. =P
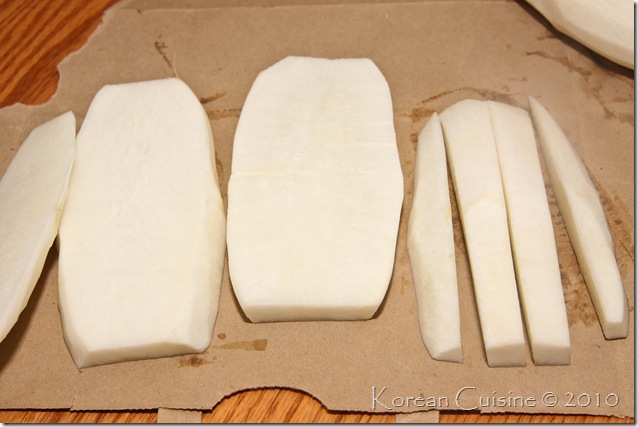
I chopped up the moo into smaller pieces than normal.

Try and make it about 1CM-ish. It will get smaller once you salt it up.

Continue chopping it ALLLLLL up and dump it into a large bowl.

Dump about 1/4 cup of salt on top…

…mix it around and just let it sit. No need to add water.
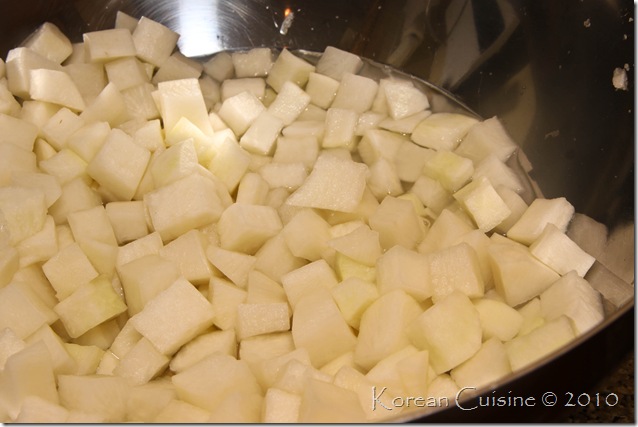
Leave it for a few hours and when you come back, there will be all this liquid in the bowl.

Rinse all the moo pieces CLEAN.

Give it a nice bath a couple of times even.
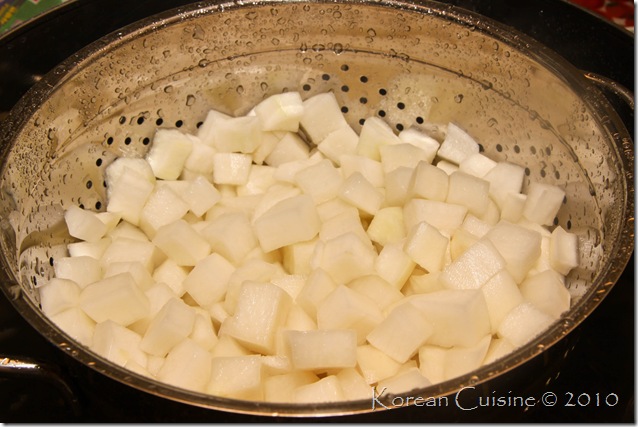
And let it sit and drain out for about 10 minutes or so.

Then add all the following ingredients: 1/4 CUP red pepper powder, 4 TB minced garlic, 1 TB salt, 3 TB honey powder, 2 TB rice wine, 1/2 TB ginger powder, 3 TB minced shrimp jut plus about 1 TB of the shrimp jut liquid.

MIX, MIX, MIX! I used this red pepper powder for the first time today. I had brought it back with me earlier this year on our trip to Korea. It looks a lot spicier than the one I used prior which is why I adjusted my recipe. I actually used half a cup of red pepper powder, but I think 1/4 cup would have been plenty.
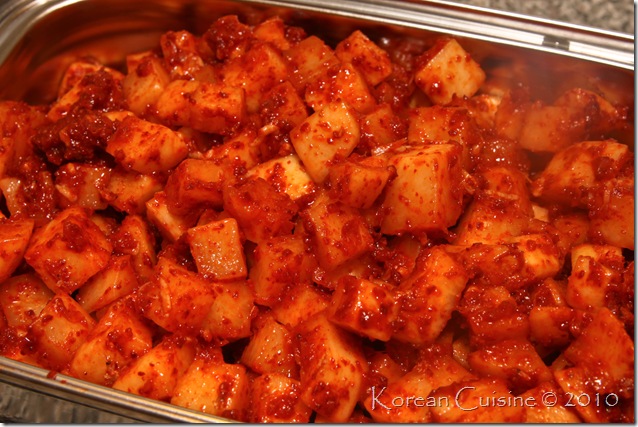
Transfer it over into a kimchi container…

And let it sit out in a cool area for 2-3 days. You’re all set!

I’m currently making beef soup with ox tails, do-gan-neeh (cow knee bone) and beef (eye of round?) It will be a sul-lung-tang of sorts. No recipe because it’s just boiling, boiling, boiling. We’re going on 10 hours so far and I plan on boiling for over 24 hours. =P
Hope you have all been doing well!
Wednesday, October 6, 2010
Steamed Egg – (계란찜) - Version 3.0
This California weather is sort of crazy, isn’t it? EARTHQUAKE weather for sure. =/ Growing up in Cali, I’m so used to earthquakes. I’ve been through quite a few of the big ones so they hardly bother me anymore – but still the thought of the next big one is pretty scary. =P
The rain has made it a lazy day today. All of Munchkin’s sports activities this week have been cancelled due to rain. This means the kid is going stir-crazy from 3PM until his bed time. Stir crazy kid means a mom that has to get dinner on the table as quickly as possible.
The following is a quick and easy way to make steamed egg all in one pot. There are other ways to make egg jjim and I have VERSION 1 and VERSON 2 right here.
Ingredients:
- 2 Eggs
- 1 CUP water
- 2 TSP shrimp jut
- handful of green onions

First crack two eggs into a small stone pot.

Pour a cup of water into it.

Add 2 TSP of shrimp jut LIQUID ONLY.

Whisk it all around thoroughly using a fork and place it on the stove on medium heat.

Once it looks like it’s just about to boil, turn down the heat to low…
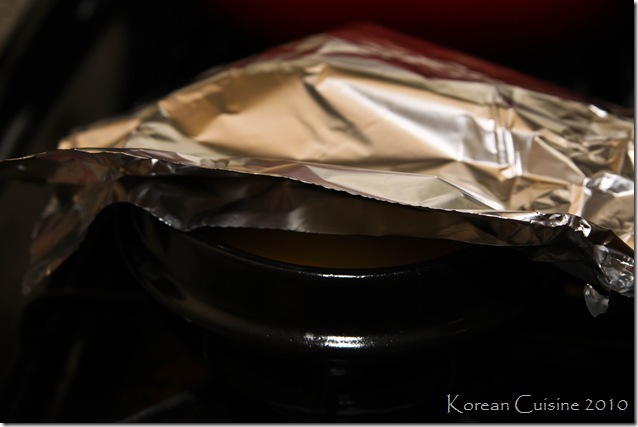
…and add a tin foil tent on top with a tiny opening to let some air out. Just let it simmer on low for about 10-15 minutes.

When it looks just about done, throw some green onions on top.

Let it continue to simmer for a couple of minutes and you’re ready to serve! This type of egg jjim tastes best when served fresh.

Even just after just a few minutes, it starts to flatten out.

It still tastes great though! This is the quickest and easiest way to enjoy egg jjim besides microwaving it. Whenever I get around to it, I’ll post up the microwave version. Enjoy and stay warm!


Munchkin’s dinner tonight also consisted of miyuk gook and clams. =P The kimchi jjigae was leftover from yesterday and was for ME. =)
Monday, September 27, 2010
Serrano Chilies in Vinegar Sauce
I was at Bristol Farms a couple of weeks ago and saw that their Serrano chilies looked particularly fresh, so I picked up a bunch. At first, I was going to pickle them in soy sauce, but then I remembered the chilies they serve at Thai restaurants and decided to make those instead. Anyhow, here goes my rendition. I made this over the weekend and did a taste test today and so far, so good.

Begin by washing and drying your chilies. I honestly don’t know how much I bought. Probably a few handfuls. =P

Then just start slicing away at them. Try to slice them as thing as you can. Usually I would use a mandolin, but these Serrano chilies were so skinny that it was easier to just chop.

I ended up with about 1 CUP of sliced chilies. If you need EXACT measurements.

Then just pour in a mixture of: 1 CUP water, 3/4 CUP vinegar, and 1 TB sugar.
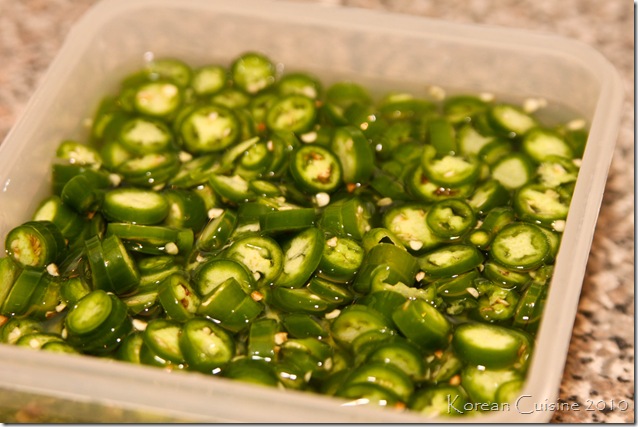
Let it sit for about a week or so inside the fridge and you’re ready to enjoy. It’s quite high on the spice scale so beware! Hope everyone in Cali is keeping cool in this crazy heat wave. I will be back soon with a Spicy Chicken Gizzard Recipe later tonight. =)
Saturday, September 25, 2010
Spicy Serrano Chiles in Vinegar and Sugar
Yup, an update will be coming soon.
I promise.
It's nothing fancy, but it's something in my fridge at the moment. =)
I missed you all once again.
Hope you have been well.
I promise.
It's nothing fancy, but it's something in my fridge at the moment. =)
I missed you all once again.
Hope you have been well.
Monday, July 19, 2010
Onion Salad
Once again, I’ve been on a blogging hiatus and I apologize for that. The weather has been SOOOOOOOOOO hot here in SoCal that just the thought of going into the kitchen and turning up the heat was suffocating. I felt bad about not cooking more often, so this past weekend we headed to K-town and picked up some meat. On Sunday we had some yummy steaks and today we ate cha-dol-begi.
Enough rambling and onto the recipe…
Ingredients:
- 1 large onion
- dressing: 1/2 TB minced garlic, 1/2 TB wasabi, 2 TB rice wine, 1 TB soy sauce and 7 TB vinegar

I was being lazy and didn’t want to head upstairs to grab my flash and THIS is what the picture looked like. =/
So I went upstairs, grabbed my flash and this is the result. It’s strange how flash works better for me with food pictures, but when I’m shooting Munchkin or anything else – I rarely use flash. Anyhow…
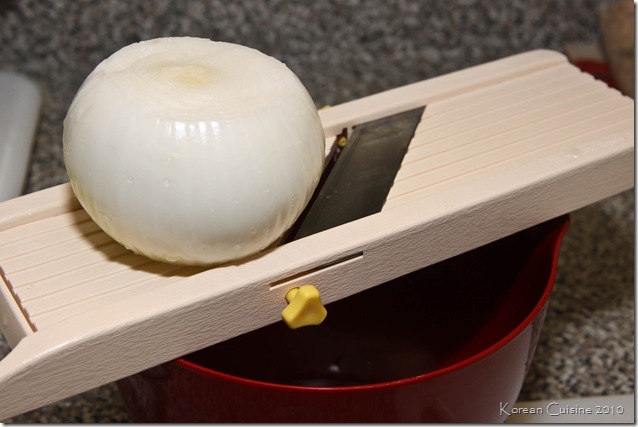
I usually eat cha-dol-begi (thinly sliced beef brisket) with this sauce. But today I decided that I would make an onion salad similar to the one they *used to* serve at Byul Dae Po – one of my favorite AYCE Korean BBQ places. The last time I was there, the server informed me that they no longer gave out the onion salad because the price of onions had skyrocketed. =/ I dunno if that’s the truth, but I’m hoping they will serve it again in the future. Anyhow this is my replication of their onion salad. Super easy and a perfect accompaniment to gogi-gogi! First, go and grab one large white onion. You can slice it by hand, or use a trusty mandolin to do the work for you! Slice away~

You want it thin, but not too thin…

And then add the following ingredients: 1/2 TB minced garlic, 1/2 TB wasabi, 2 TB rice wine, 1 TB soy sauce and 7 TB vinegar.

Mix it up WELL. You do not want to bite down into a chunk of wasabi.

And transfer it into a nice serving bowl. You’ll be left with quite a bit of liquid so just pour it over the top and discard any excess.

You’re now ready to eat with some gogi!

I know I’ve mentioned Choice Meat Market before and if you haven’t already, you MUST go and try their meats.

It’s a lot more than what you would pay at the K-market, but their meat melts in your mouth.

I sliced up some onions and mushrooms…

Got our trusty old indoor gogi-grill going (there’s even a compartment that collects the drained fat!) – I think the last time we brought this out was over two years ago!

And then it was grilling time!

We ate the whole thing!

Everyone in our small family of three was happy and full! Hope everyone is doing well. I will *try* to be back sooner rather than later. =)
Subscribe to:
Posts (Atom)
LinkWithin


